Gatsby 기반의 팀 기술 블로그 생성
June 06, 2023
이 글은 히빗팀 백엔드 팬시님이 작성했습니다.
팀 기술 블로그
- 이전까지 팀 프로젝트를 진행하면서, 한번도 프로젝트에 관한 기술 블로그를 작성한 적이 없었다.
- 팀 프로젝트를 진행하는 경우, 각자의 역할과 업무가 다르고 그에 맞는 기술들을 프로젝트에 적용시키는 경우가 많다. 프로젝트를 진행했을 시점에는 내 업무가 아닌, 다른 사람의 업무가 궁금하다면 수시로 물어봐서 확인할 수 있다. 하지만, 프로젝트가 끝난 이후에는 요청하기가 선뜻 쉽지 않다.
- 팀 기술 블로그를 만든 이유는 간단하다. 팀 안에 속한 개발자들이 각자의 업무를 진행하면서 어려운 문제들을 직면했을 때, 어떻게 해결했는지에 대한 과정들을 기술 블로그를 통해 공유하는 목적이 크다.
- 서로간의 문제 해결 과정을
공유하면서함께 성장하는 취지로 팀 기술 블로그를 만들게 되었다.
Gastby 기반의 블로그 테마

Gastby는 React를 기반으로 하며 최근 프론트엔드 시장에서 자주 등장하며 빠르게 성장하고 있는 JAM Stack 기반의 정적 사이트 생성 프레임워크이다.
Gatsby를 사용하는 이유
- React.js 기반의 프레임워크이다 : react를 어느 정도 다룰 줄 알면, 큰 어려움 없이 개발이 가능하다.
- 성능이 좋다 : JavaScript가 실행되면 빈 HTML 페이지 안에 마크업을 추가해주는 일반적인 React SPA(Single Page Application)과는 다르게, 페이지 개발 후 Build를 하는 과정에서 마크업(.md)이 생성되기 때문에 일반 SPA 페이지보다 빠르게 페이지를 랜더링할 수 있다.
- SEO에 유리하다 : 2번에서 말했던 대로 Build 과정에서 마크업이 생성되면서 페이지 내 모든 콘텐츠가 생성이 되어서 SPA과는 다르게 SEO(검색엔진최적화)에 유리하다. 다른 프레임워크 Next.js는 정적 사이트 생성의 기능도 있지만 주로 SSR(Server Side Rendering)을 사용하는 프레임워크다. 즉, 서버와 통신을 하며 요청을 받을 때마다 동적으로 웹 사이트를 생성하기 때문에 SEO에 불리하다는 단점이 있다.
gastby-starter-bee
-
많은 Gatsby 기반의 블로그 테마()를 봐왔지만, 테마를 고르는 기준은 크게 2가지로 봤다.
-
- UI가 이쁘고 깔끔하면서, UX 관점에서 이동이 편리하다.
-
- 기술 블로그에 대한 설명이 어느 정도 있어야 한다.
-

- 그래서 JaeYeopHan이 만드신 Bee starter를 사용하기로 했다.
사전 작업
Mac기반으로 설치했기 때문에, Windows는 다를 수 있다는 점을 유의해주시면 감사하겠습니다
- 우선, npm, node가 설치 되어 있어야 하며, 각 버전은 아래와 같이 설정해줘야 한다.
npm -v // 6.14.8
node -v // v14.15.0
nvm ls로 현재 본인이 어느 버전에 해당하는 지 확인한다.

- 만약 node 버전이
14.15.0이 아니라면 아래와 같이 설치해서 default 해준다.
nvm uninstall 14 // node 버전이 14.15.0 이 아닌 다른 버전이 설치되어있는 경우 삭제하고 다시 설치한다.
arch -x86_64 zsh
nvm install 14
nvm alias default 14
Install
1. Create a Gatsby site
npm install -g gatsby-cli
gatsby new hibit.github.io https://github.com/JaeYeopHan/gatsby-starter-bee- 만약 설치가 안됐으면, 아래의 오류들을 마주하게 될 것이다.
ERROR1. nvm 설치 오류
nvm --version
zsh: command not found: nvm- bash shell에서는 nvm 명령어를 제대로 인식하지만, mac의 default shell인 zsh에서는 nvm을 인식하지 못하는 문제라고 한다.
- 이럴 경우,
zsh파일을 열어 아래 텍스트를 추가해준다. - zsh 파일 열기
vi .zshrc- 환경변수 추가하기
export NVM_DIR="$HOME/.nvm"
[ -s "$NVM_DIR/nvm.sh" ] && \. "$NVM_DIR/nvm.sh"- 환경변수 추가한 뒤, 저장하고 나온다(
:wq)
source ~/.zshrc- 만약
nvm --version을 확인해도 안나온다면, zsh 파일을 다시 열고 아래의 코드를 추가한다.
vi .zshrcexport NVM_DIR=~/.nvm
source $(brew --prefix nvm)/nvm.shsource ~/.zshrc- 그런 다음, 다시
nvm --version을 확인하면 version이0.39대로 나오면 된다.
nvm --version // 0.39.0 혹은 0.39.3ERROR2. sharp error
- shrap error가 발생하면 아래와 같이 나온다.
npm ERR! code ELIFECYCLE
npm ERR! errno 1
npm ERR! sharp@0.32.1 install: `(node install/libvips && node install/dll-copy && prebuild-install) || (node install/can-compile && node-gyp rebuild && node install/dll-copy)`
npm ERR! Exit status 1
npm ERR!
npm ERR! Failed at the sharp@0.32.1 install script.
npm ERR! This is probably not a problem with npm. There is likely additional logging output above.

npm ERR! A complete log of this run can be found in:
npm ERR! /Users/som/.npm/_logs/2023-05-20T09_03_58_512Z-debug.log- 이런 경우, sharp 해당 버전을 설치하면 된다.
➜  ~ npm view sharp dist-tags.latest
0.32.1
➜  ~ npm install sharp@0.32.1
npm install명령어를 입력해서 정상적으로 설치되면 아래와 같은 화면이 나오게 된다.

예외 사항
위의 에러 사항들 외에도 문제가 발생한다면, 기존의 npm의 cahce, node_modules, package-lock.json을 삭제하고 블로그 테마 주인이신
JaeYeopHan님이 만든 gatsby-starter-bee의 pacakage.json 파일을 복붙한다. 그리고 다시npm install한다.
2. Start developing
- 해당 폴더에 이동한 다음
npm start명령어를 입력한다.
ERROR 1. permission
- 빌드 과정에서 permission이 없어서 아래와 같이 오류가 발생한다.
Error: EACCES: permission denied, open '/Users/som/.config/gatsby/config.json'
You don't have access to this file.

    at Object.openSync (fs.js:476:3)
    at Object.readFileSync (fs.js:377:35)
    at Configstore.get all [as all] (/Users/som/Desktop/coding/my-blog-starter/node_modules/configstore/index.js:34:25)
    at new Configstore (/Users/som/Desktop/coding/my-blog-starter/node_modules/configstore/index.js:27:13)
    at Object.getConfigStore (/Users/som/Desktop/coding/my-blog-starter/node_modules/gatsby-core-utils/dist/get-config-store.js:18:14)
    at Object.<anonymous> (/Users/som/Desktop/coding/my-blog-starter/node_modules/gatsby-recipes/src/providers/npm/package.js:12:24)
    at Module._compile (internal/modules/cjs/loader.js:1063:30)
    at Object.Module._extensions..js (internal/modules/cjs/loader.js:1092:10)
    at Module.load (internal/modules/cjs/loader.js:928:32)
at Function.Module._load (internal/modules/cjs/loader.js:769:14)- 이런 오류가 발생한다면,
chmod명령어를 통해 폴더별 권한을 변경한다.
sudo chmod -R 777 /Users/som/.config/gatsby/ERROR 2. Cannot find module ‘react-dev-utils/getPublicUrlOrPath’
해결 방법
npm install --save-dev react-dev-utils
// or
npm install react-dev-utils --save- 그리고 다시
npm start명령어를 입력해서 정상적으로 성공이 나오면, 아래와 같은 화면이 나온다.(localhost:8000)

3. Gatsby config 수정
- 설치가 완료되었으면, 이제 config에 있는 기본 값들을 바꾸면 된다.
gatsby-meta-config.js 파일 수정
module.exports = {
  title: `hibit`,
  description: `Blog posted about ...`,
  author: `Hibit-Team`,
  introduction: `히빗팀 기술 블로그입니다.`,
  siteUrl: `https://hibit-team.github.io/`, // Your blog site url
  social: {
    github: `hibit-team/hibit-team.github.io/`, // Your GitHub account
    instagram: `hibit.co.kr/`, // Your Instagram account
  },
  icon: `content/assets/felog.png`, // Add your favicon
  keywords: [`blog`],
  comment: {
    disqusShortName: '', // Your disqus-short-name. check disqus.com.
    utterances: 'hibit-team/hibit-team.github.io', // Your repository for archive comment
  },
  configs: {
    countOfInitialPost: 10, // Config your initial count of post
  },
  sponsor: {
    buyMeACoffeeId: 'devFancy',
  },
  share: {
    facebookAppId: '', // Add facebookAppId for using facebook share feature v3.2
  },
  ga: '0', // Add your google analytics tranking ID
  ad: '', // Add your google adsense publisherId `ca-pub-xxxxxxxxxx`
}
package.json 수정
- scripts 내부에
"deploy": ~~~추가한다. (참고로, github pages로 배포한다)
{
  "name": "hibit",
  "private": true,
  "description": "hibit's github blog",
  "version": "0.1.0",
  "author": "fancy.junyongmoon@gmail.com",
  "bugs": {
    "url": "https://hibit-team.github.io/" // 깃허브 블로그 주소
  },
  // ... 중간 생략
  "scripts": {
    "post": "gatsby-post-gen",
    "dev": "gatsby develop",
    "lint": "eslint --ext .js,.jsx --ignore-pattern public .",
    "format": "prettier --trailing-comma es5 --no-semi --single-quote --write 'src/**/*.js' 'src/**/*.md'",
    "develop": "gatsby develop",
    "start": "npm run develop",
    "build": "gatsby build",
    "fix-semi": "eslint --quiet --ignore-pattern node_modules --ignore-pattern public --parser babel-eslint --no-eslintrc --rule '{\"semi\": [2, \"never\"], \"no-extra-semi\": [2]}' --fix gatsby-node.js",
    "deploy": "gatsby build && develop -d public -b master"
  }
}- 이때 소스 코드 빌드 후의 public 폴더를 github
master브랜치에 push 한다는 의미이고, 이 소스코드로https://hibit-team.github.io/에 배포한다는 의미이다.
4. deploy 하기
-
깃허브 repository 이름은
hibit-team.github.io으로 만들어 준다.- 만약, 개인 repository가 아닌 organization에서 만든 다면, origanization 이름과 일치해서 만들어줘야 한다.
- e.g. github name: devfancy ->
devfancy.github.io - e.g. organization name: hibit-team ->
hibit-team.github.io
- 기술 블로그가 있는 폴더의 터미널에서 git을 세팅한다.
git init
git remote add origin https://github.com/hibit-team/hibit-team.github.io.git- git 연동을 확인한다.
git remote -vorigin https://github.com/hibit-team/hibit-team.github.io.git (fetch)
origin https://github.com/hibit-team/hibit-team.github.io.git (push)- add, commit, push
git add .
git commit -m "first commit"
git push origin master
# master or main 확인 꼭 할 것!- 소스 코드가 제대로 업로드 되었다면, 배포 단계로 간다.
- deploy 명령어를 입력하기 전에
gh-pages를 설치한다.
npm install -g gh-pages --save-dev- 그리고 deploy 명령어를 입력한다.
npm run deploy- 정상적으로 성공하면, 마지막에
Published단어가 보인다. - master 브랜치에 가보면, 아래와 같이 빌드된 파일들이 업로드 된 것을 확인할 수 있다.

5. 브랜치 분리(develop 생성)
- 배포는 develop 브랜치에서 하기 때문에 브랜치를 분리한다.
git branch develop
git checkout develop- develop 브랜치에 수정한 코드 git에 올린다.
git add .
git commit -m “commit message”
git push -u origin develop- 소스코드가 develop 브랜치에 잘 올라갔다면, github default 브랜치를 develop으로 바꿔준다.

- 그러면 develop 브랜치에서 업로드된 파일을 확인할 수 있다.

Content - post 업로드
- 이제 설치도 끝났고, 배포도 되었으니 원하는 post를 만들어서 업로드하는 과정을 한다.
- 내용은
content/blog폴더에 가면 있다. - 새로운 post를 만드는 과정은 아래와 같다.
Support script for creating new post
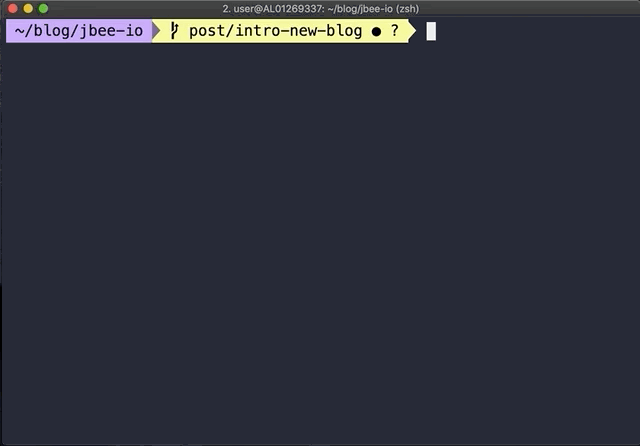
npm run post- post에 내용을 입력한 다음, github에 업로드하면 된다. (주의: 반드시 develop 브랜치에서 작업해야 함)
git add .
git commit -m "commit message"
git push origin develop
git run deploy
마치며..
- Gatsby 기반의 기술 블로그를 세팅하는 작업을 하며 다양한 오류들을 접하게 되면서, 해결하는 과정이 힘들었지만, 뒤돌아 생각해보면 많은 것을 배우게 되었다.
- Gatsby 기반 폴더 구조와 설치하는 과정을 알게 되었지만, 100% 이해는 못했다. 추후에 여유가 된다면 Gatsby에 대한 깊은 지식을 다뤄볼 예정이다.
- 추가적으로 지금은 배포에 대한 명령어를 수시로 입력해야 하는데, 해당 부분을 Github Action을 활용하여 배포 자동화를 적용할 예정이다.
해당 기술 블로그 세팅 작업을 도와주신 푸린님께 이 자리를 빌어 감사의 말씀 전합니다.
